Computer Aided Design
Model a possible final project using raster, vector, 2D, and 3D tools; explore at least two new tools.
Assignment:
This week the Assignment was to model(raster, vector, 2D, 3D, render, animate, simulate, …) a possible final project and explore as many software tools possible while doing that.
In addition to that, my Regional Instructor told me to explore atleast 2 new software tools, that I didn’t previously use.
Before I start, I’ll be honest here, I am quite the newbie when it comes to designing stuff. Most of my design work is not very complicated and I usually just depend on other people for designs. I take ‘making’ as something like cooking. I just follow the recipes from Instructables or thingiverse, and I end up making them.
So, this week is probably going to be quite challenging to me while I try to get a grasp of how the CAD process actually works and I hope I will be able to start creating my own design.
2D Design: Raster and Vector
What’s a Raster Image
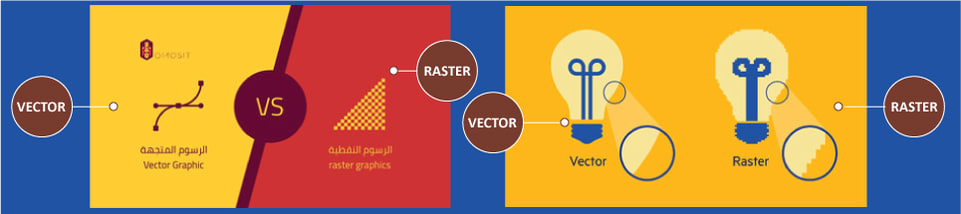
Raster images are bitmap images which are comprised of individual pixels. So an image of 800x800 resolution will have 640,000 individual pixels. The problem with Raster Images is that when you scale it to a certain maginification, it will always start losing detail. Raster Images can be edited pixel by pixel, giving it rich and vibrant detail. Raster images are good for photos, artwork and video game sprites that require detail over scalability.
What’s a Vector Image
Vector Images are made of mathematical equations instead of bitmapms of pixels. Which makes them scalable infintely. All vector images are just mathematical equations resulting in paths. Think of it like a formula that describes an image which can be scaled to any size.
This illustration I found on PsPrint explains it well.
Raster Designing
For my raster artwork part of the project, I chose to use Microsoft Paint, Adobe Photoshop. and GIMP. You might be wondering, why MS paint… it is because that’s probably the only raster design software I know I am completely proficient with.
MS Paint
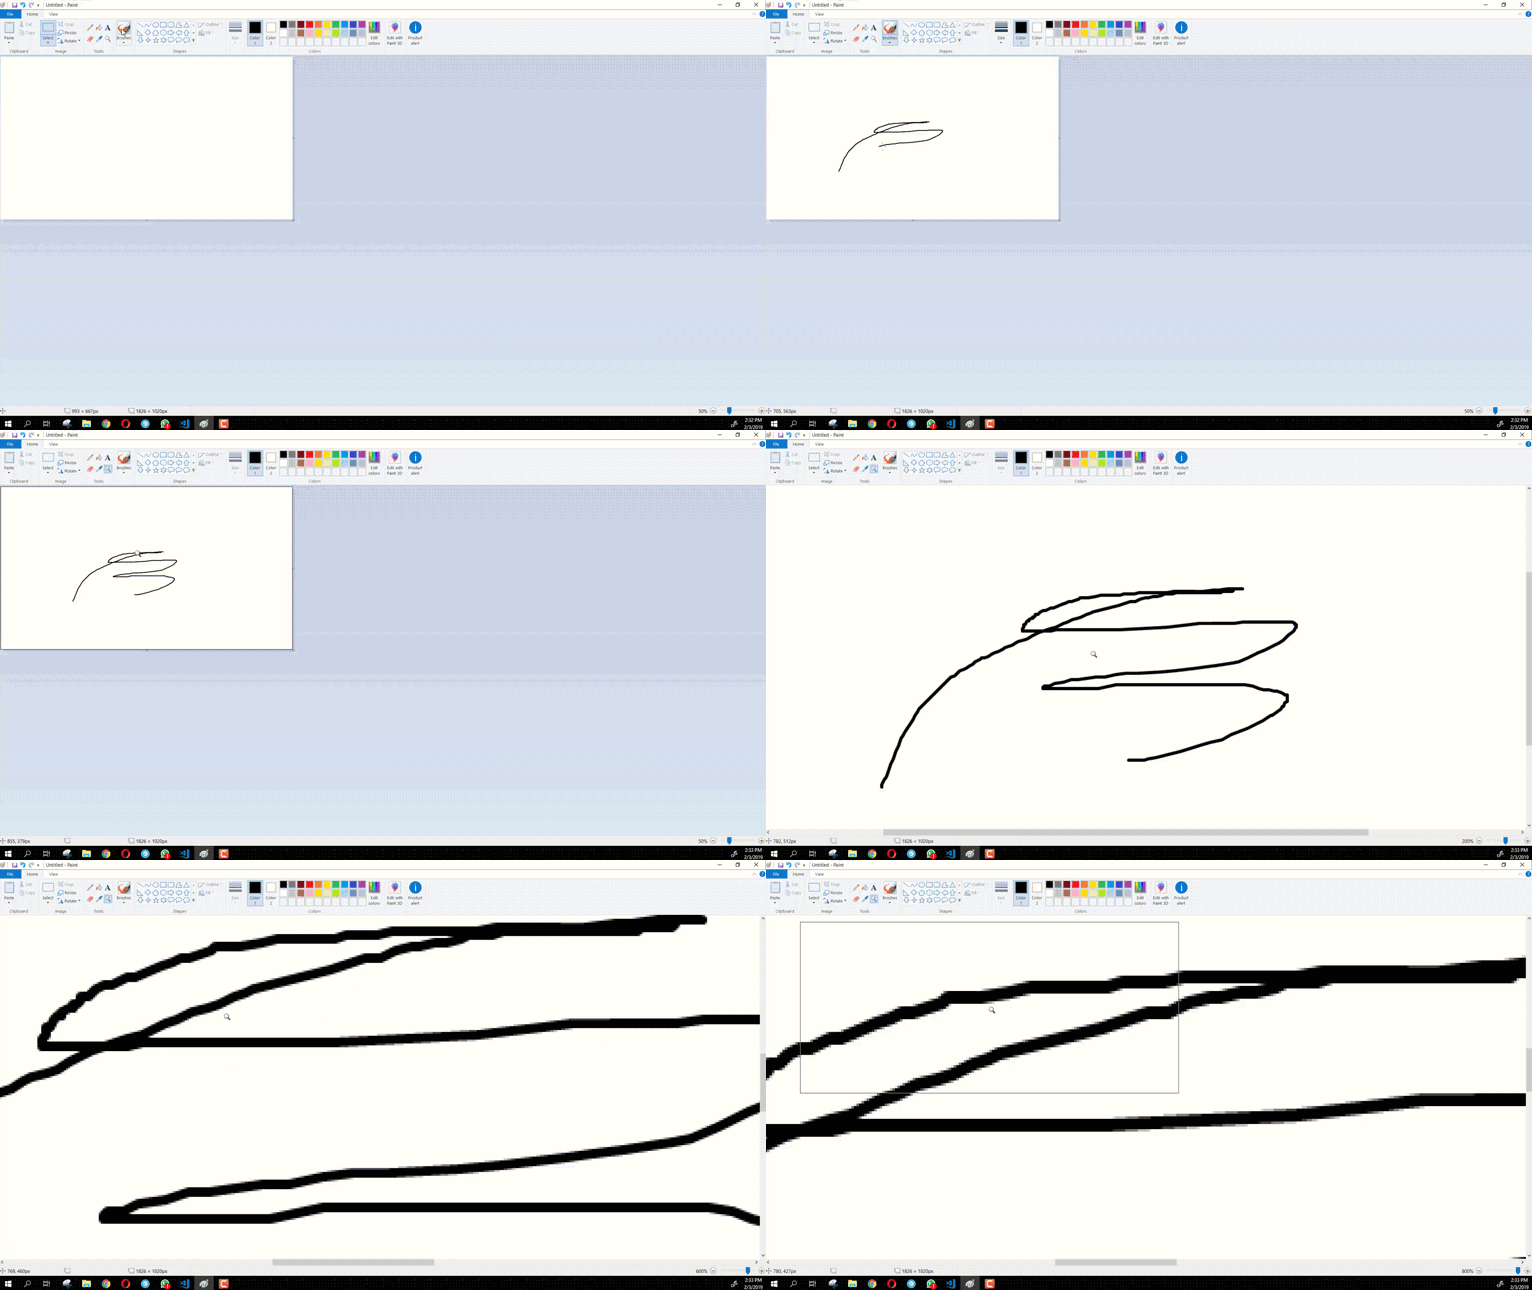
Since I am very used to the UI on this, it took me about 7 minutes to come up with this rough sketch.
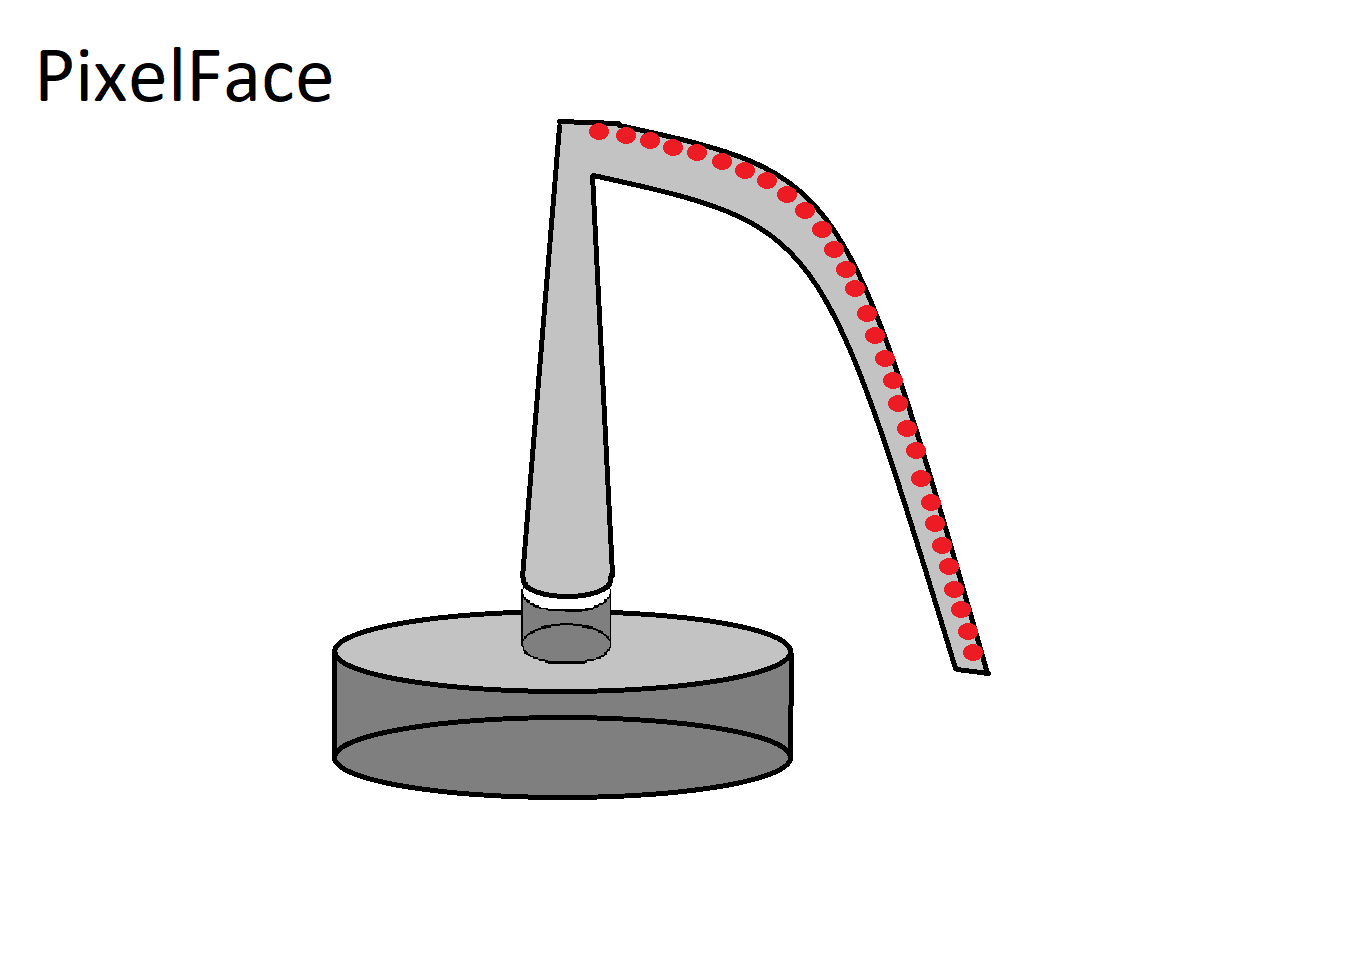
Here’s a 4x video of the total workprocess.
I would’t really recomend MS paint for anything but rough sketches, but this app is probably the lightest and easiest to use out there. It is definitely underrated compared to it’s capabilities.
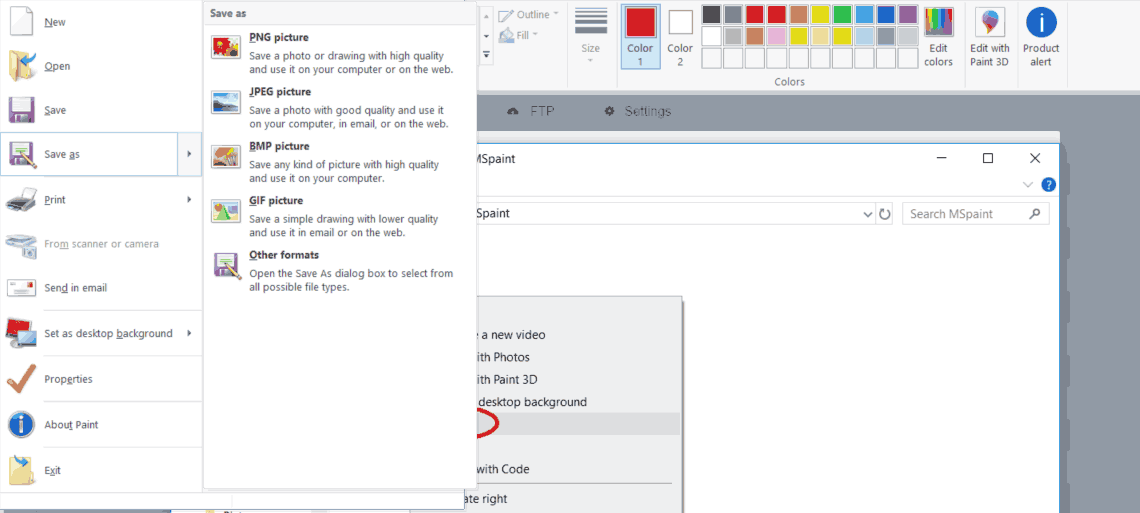
Another nifty thing you could do with MS paint is quick convert between image types. Just right click and click on edit on any image,
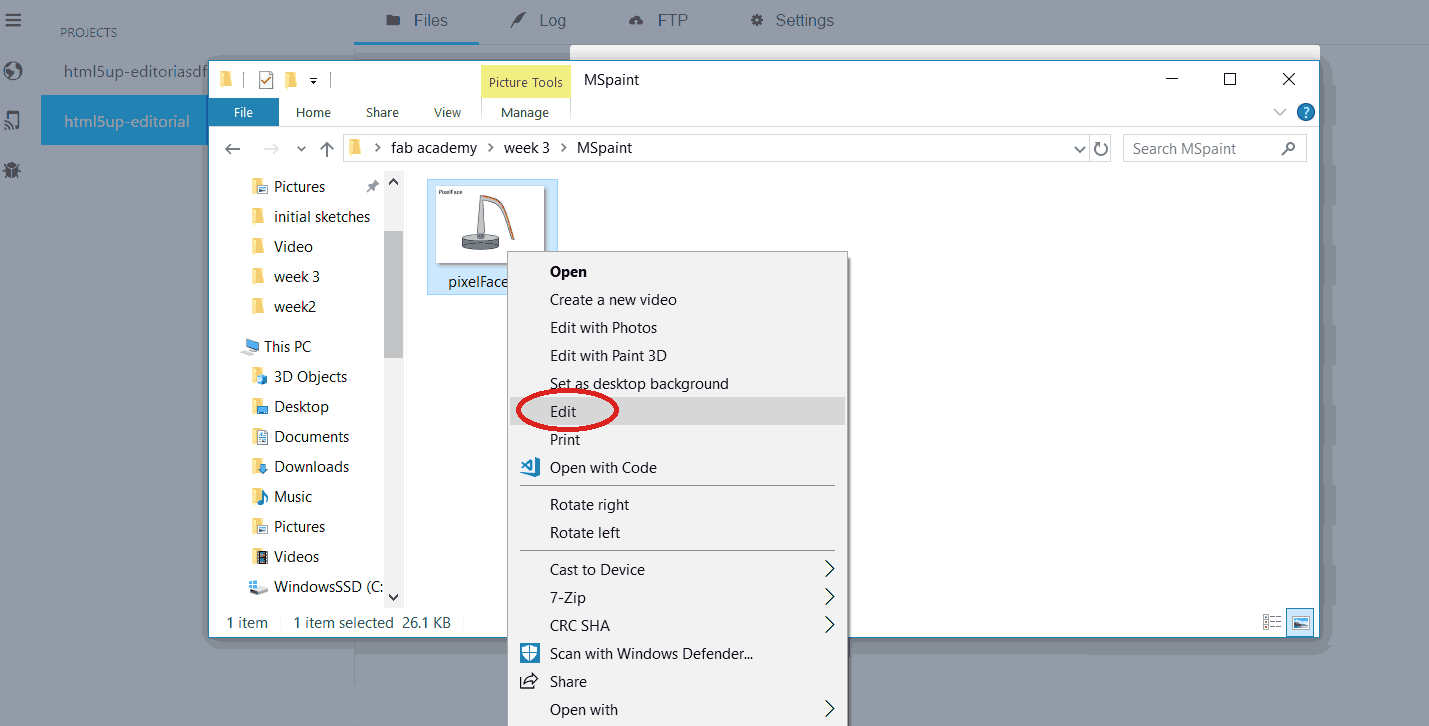
it should open with MS paint by default on windows. Go to File > Save As > save as desired file type.
GIMP
GIMP is another raster graphics manipulation tool which just happens to be cross platform. It has always been in my list of things to learn because I wanted to shift to a Linux environment for a while now.
GIMP can be freely downloaded from here.
The first thing I noticed about GIMP is that the UI didn’t seem very intuitive. After struggling with it for about two hours, I was able to come up with this image.
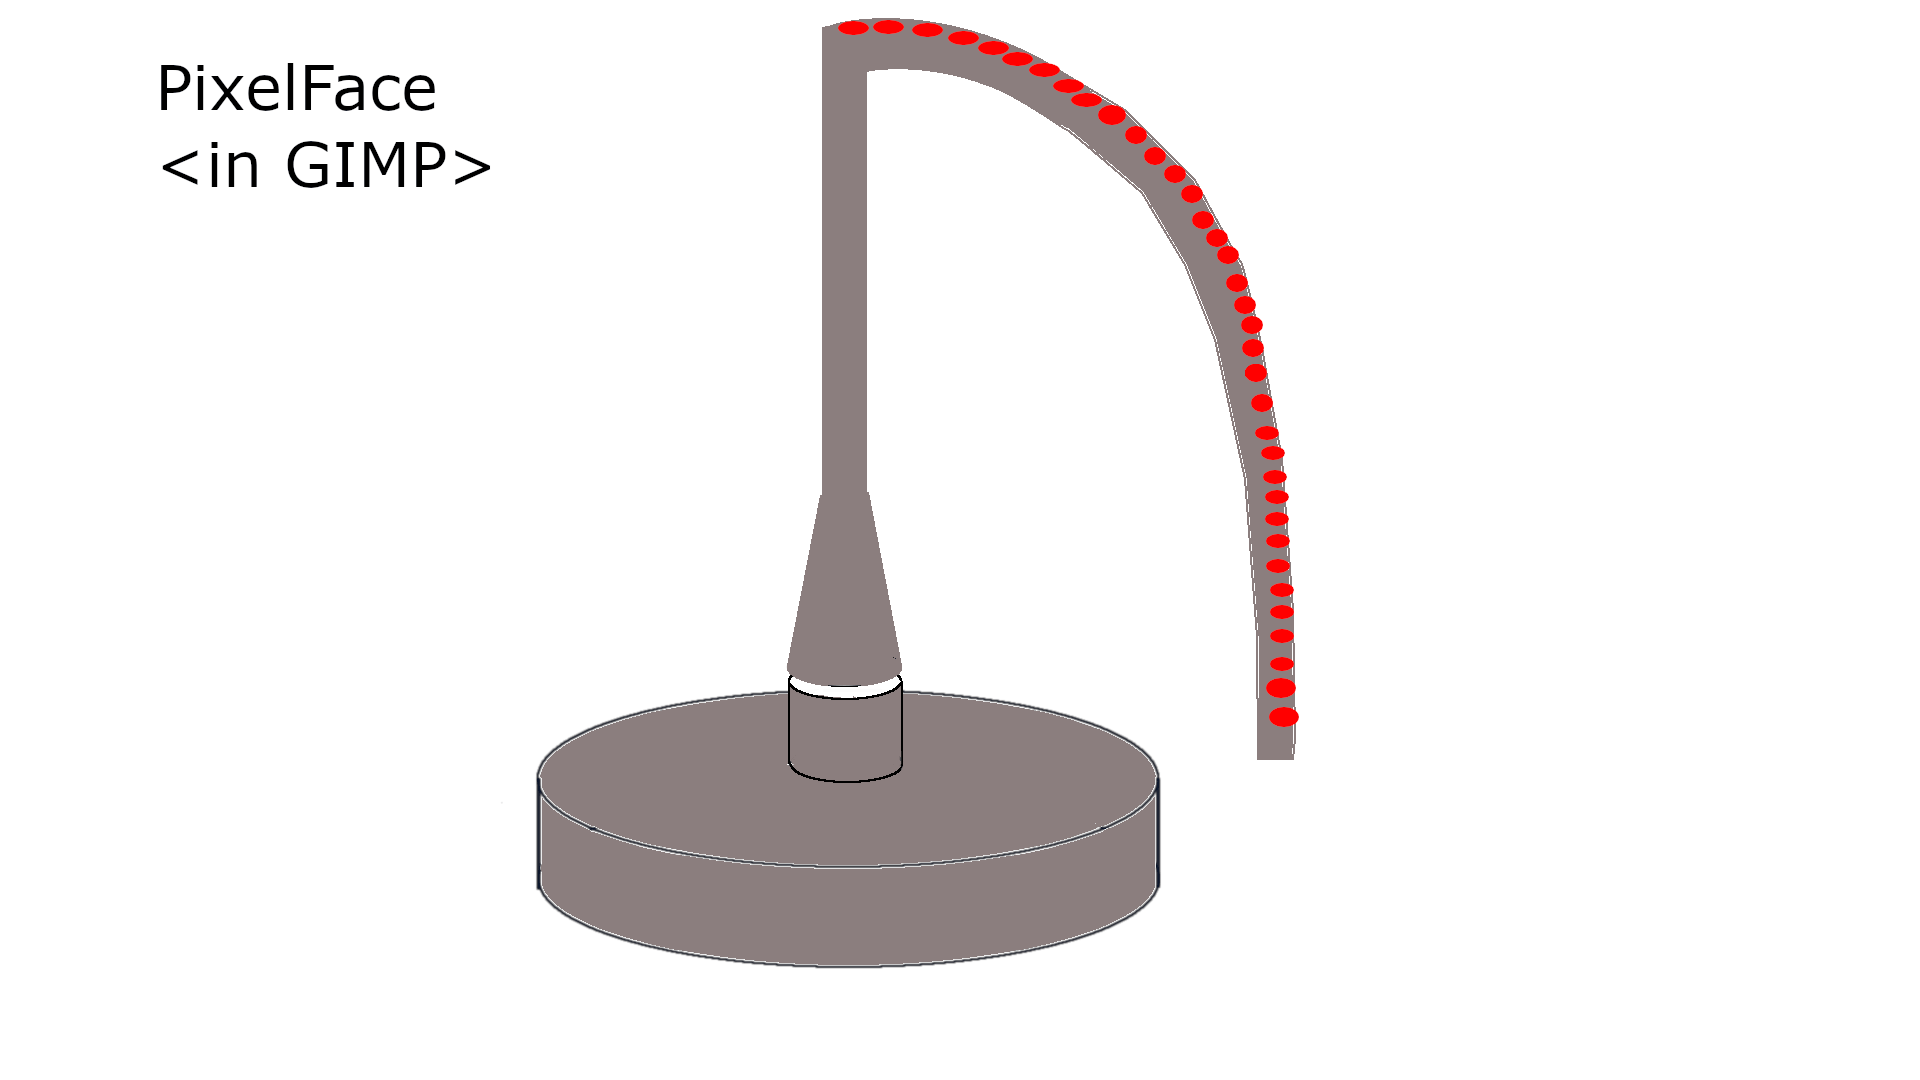
Here’s a full video of me struggling through the GIMP work process. Do watch it with increased playspeed, it’s a whole 1hr+ because my low spec laptop can’t edit/render videos this long. It was showing me a render time of 8 hours, so I just uploaded to YouTube directly.
A nifty plugin of GIMP can be installed with BIMP, which can do batch image manipulation.
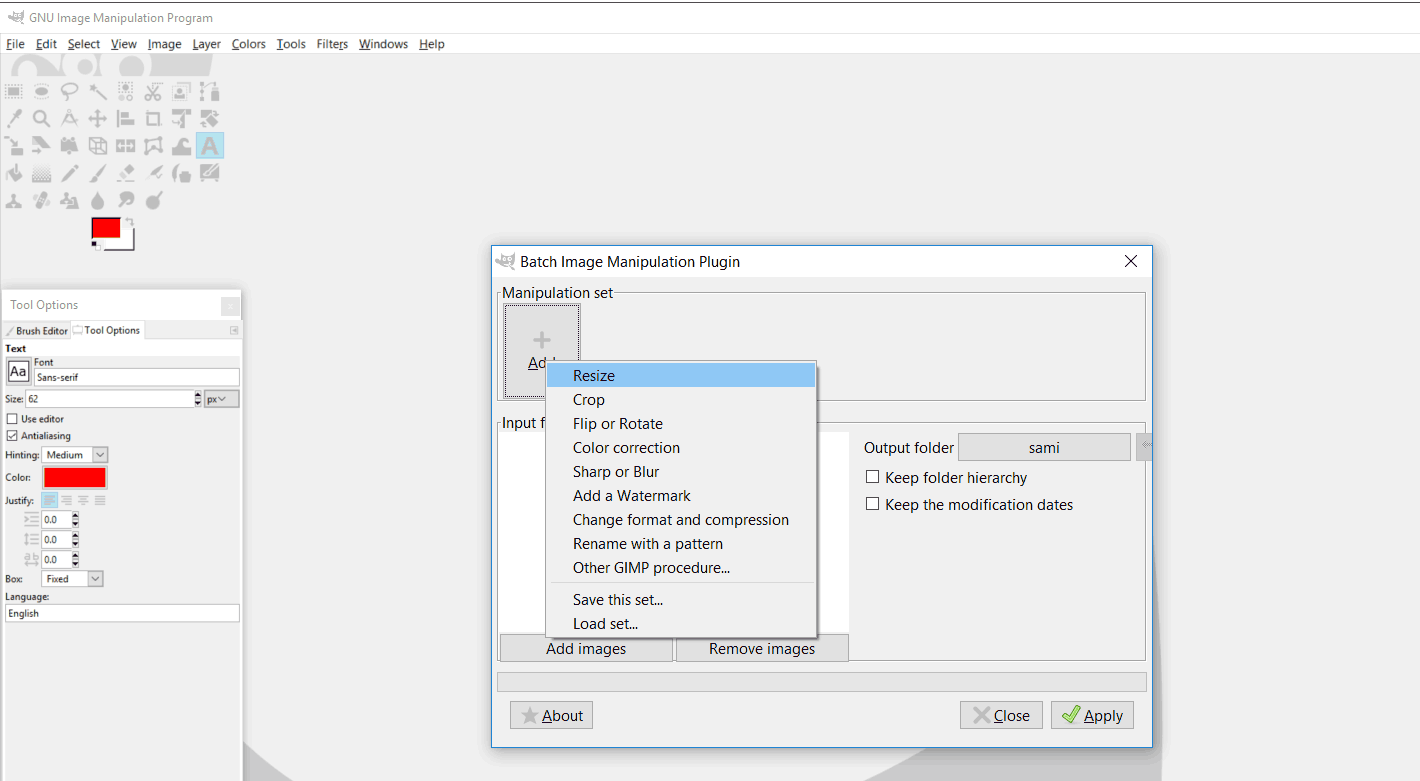
Adobe Photoshop
Adobe Photoshop is probably the most powerfull raster graphics software out there which is widely accepted by professionals. It has many tools and features that I have yet to discover, but I use it’s “export for web” feature alot to export/convert/resize graphics files. But, other than that, I am quite oblivious to it. Since I did some struggling with GIMP, I decided to watch some beginner tutorials first, which I found here, before starting to draw using Photoshop.
After you open photoshop, you’ll get a prompt which will help you create a new file. There are many available presets ready for you here. For now I’ll just go with a 720p preset.
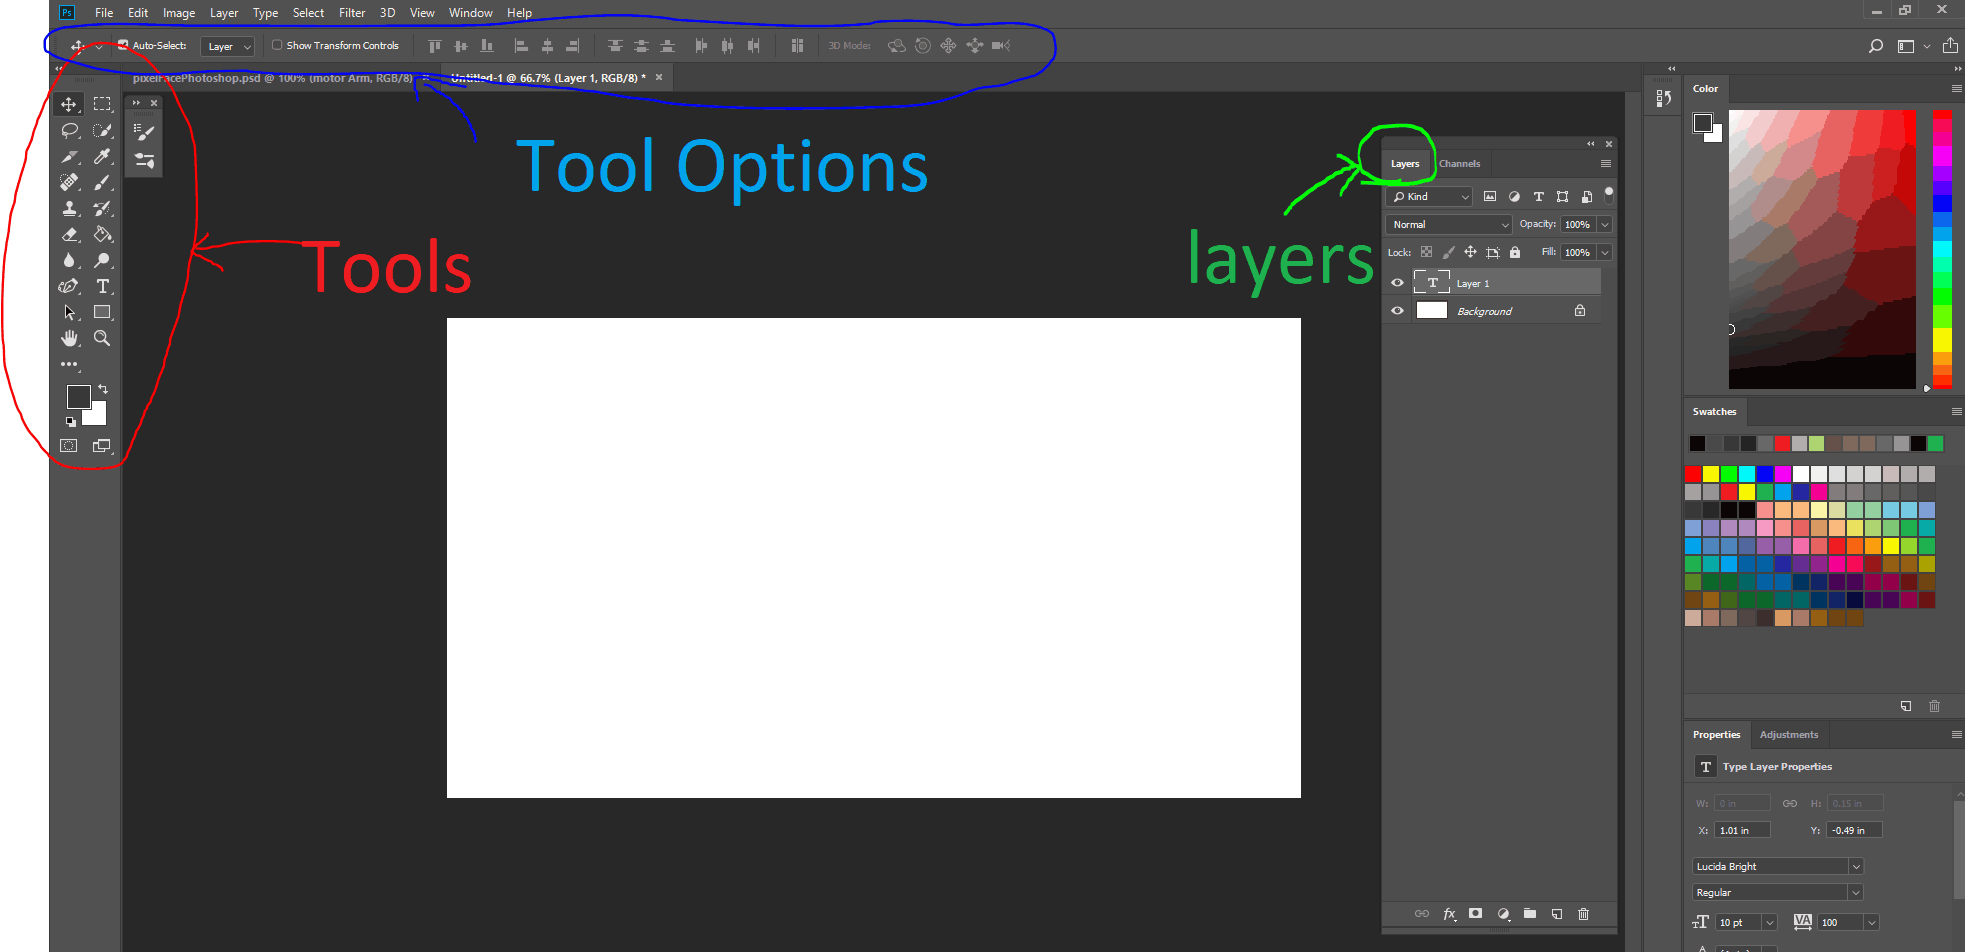
First thing to notice about photoshop, is that like GIMP it works in layers. The Layers menu can be found on the right side. If it’s not there, you can just customize everything from the ‘Windows’ option.
The next thing you should be aware about is your tool box. Each of these tools have a huge mastery curve. I’ll be using the basic shapes tool, pen tool, selection tool and fill tool for today’s work.
I watched these beginner tutorials to get me started with the pen tool and all the other basic stuff.
- The Pen tool Explained
- How to draw Straight Lines in Photoshop
- Hand sketching in Photoshop
- How to Draw in photoshop: Sketching Tutorial
And then Came up with this raster image of my project.
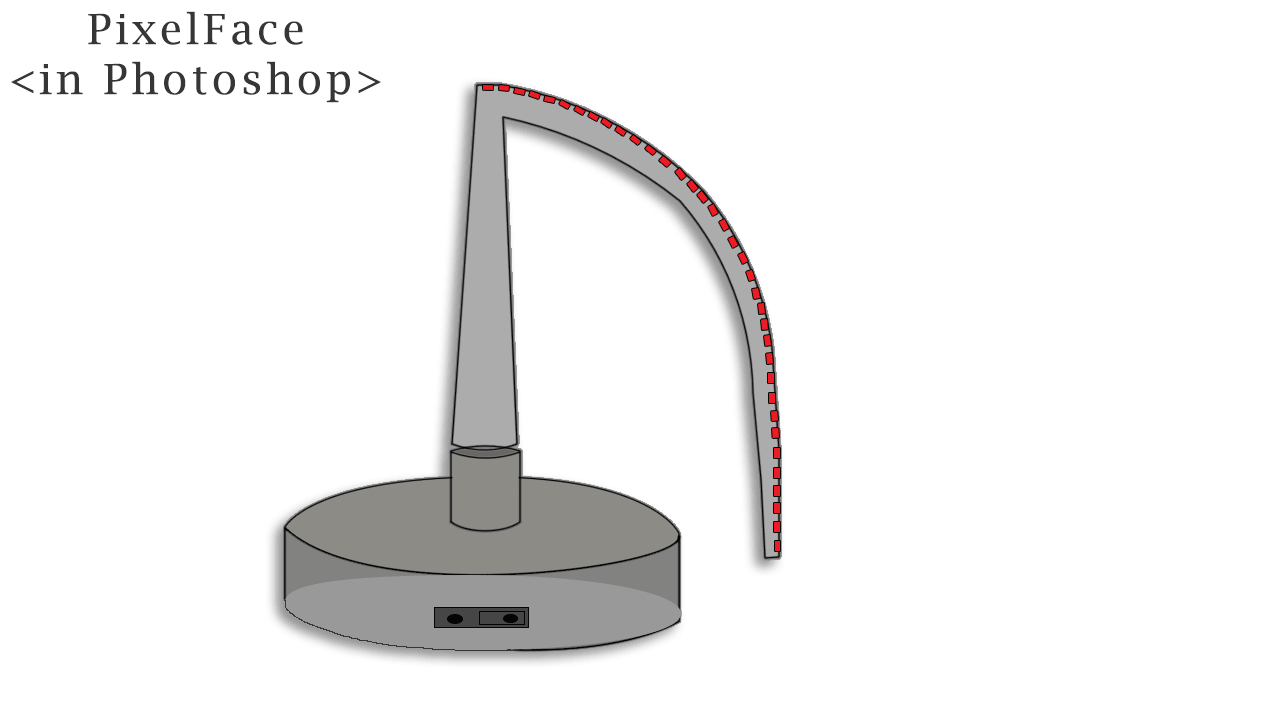
Here’s a full screen capture of my workprocess through photoshop.
Vector Designing
For Vector designing, I chose to go with Illustrator and Inkscape. I had illustrator installed because I worked at an Advertisement firm before and they heavily use Illustrator and Photoshop. FYI, I just needed to be able to open files and view. Never really had to do any of the design work myself. So all of it was quite new for me.
Adobe Illustrator
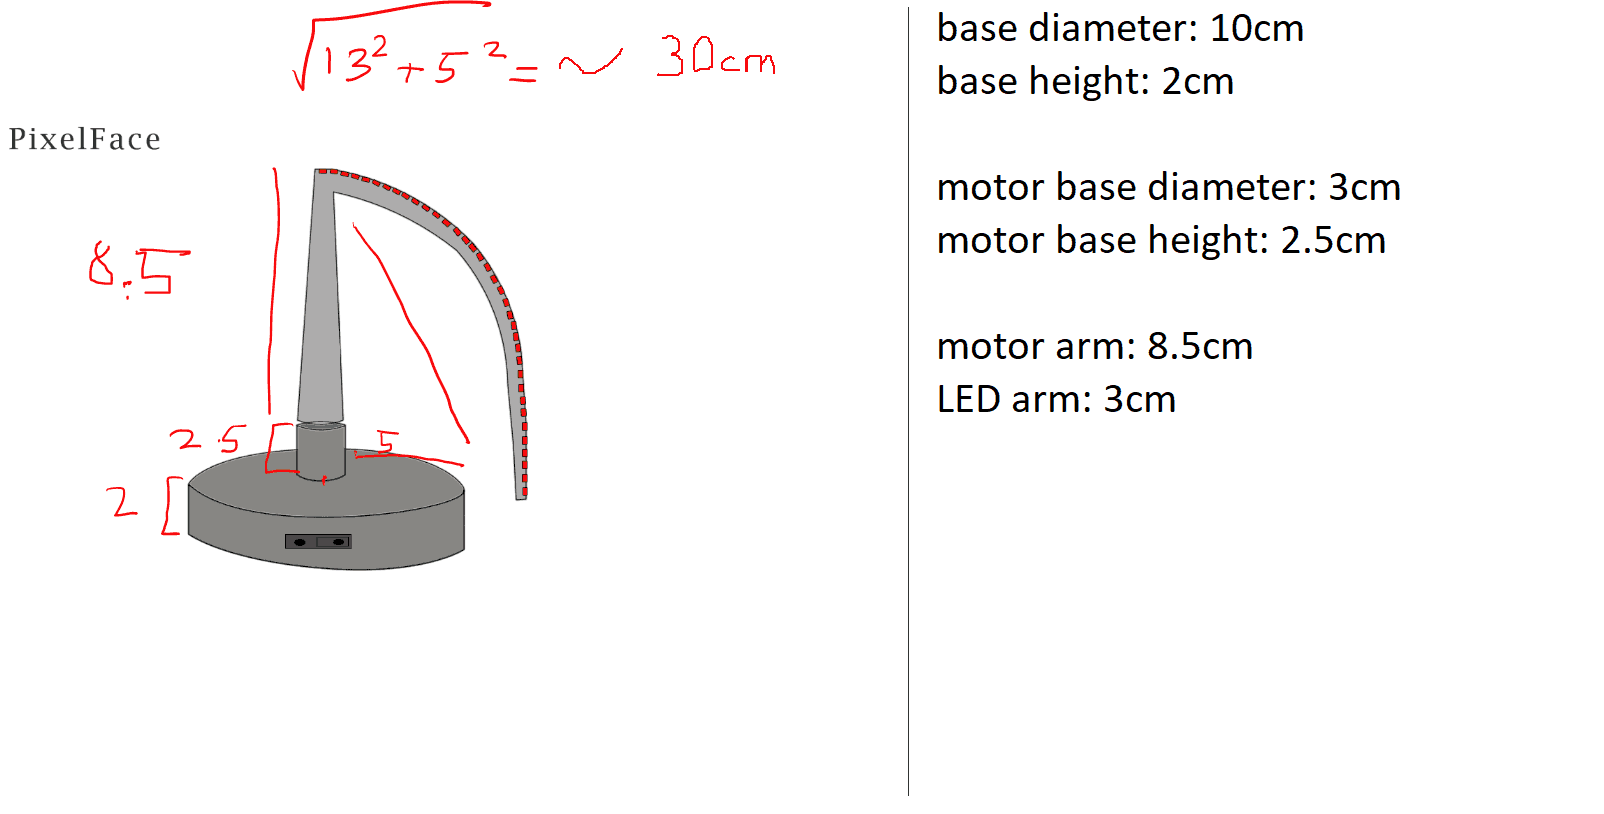
I will try to create a rough laser cutout of my initial project sketch using Illustrator while exploring vector art. First I calculated a rough dimension of the cutouts I would like to make using MS paint,
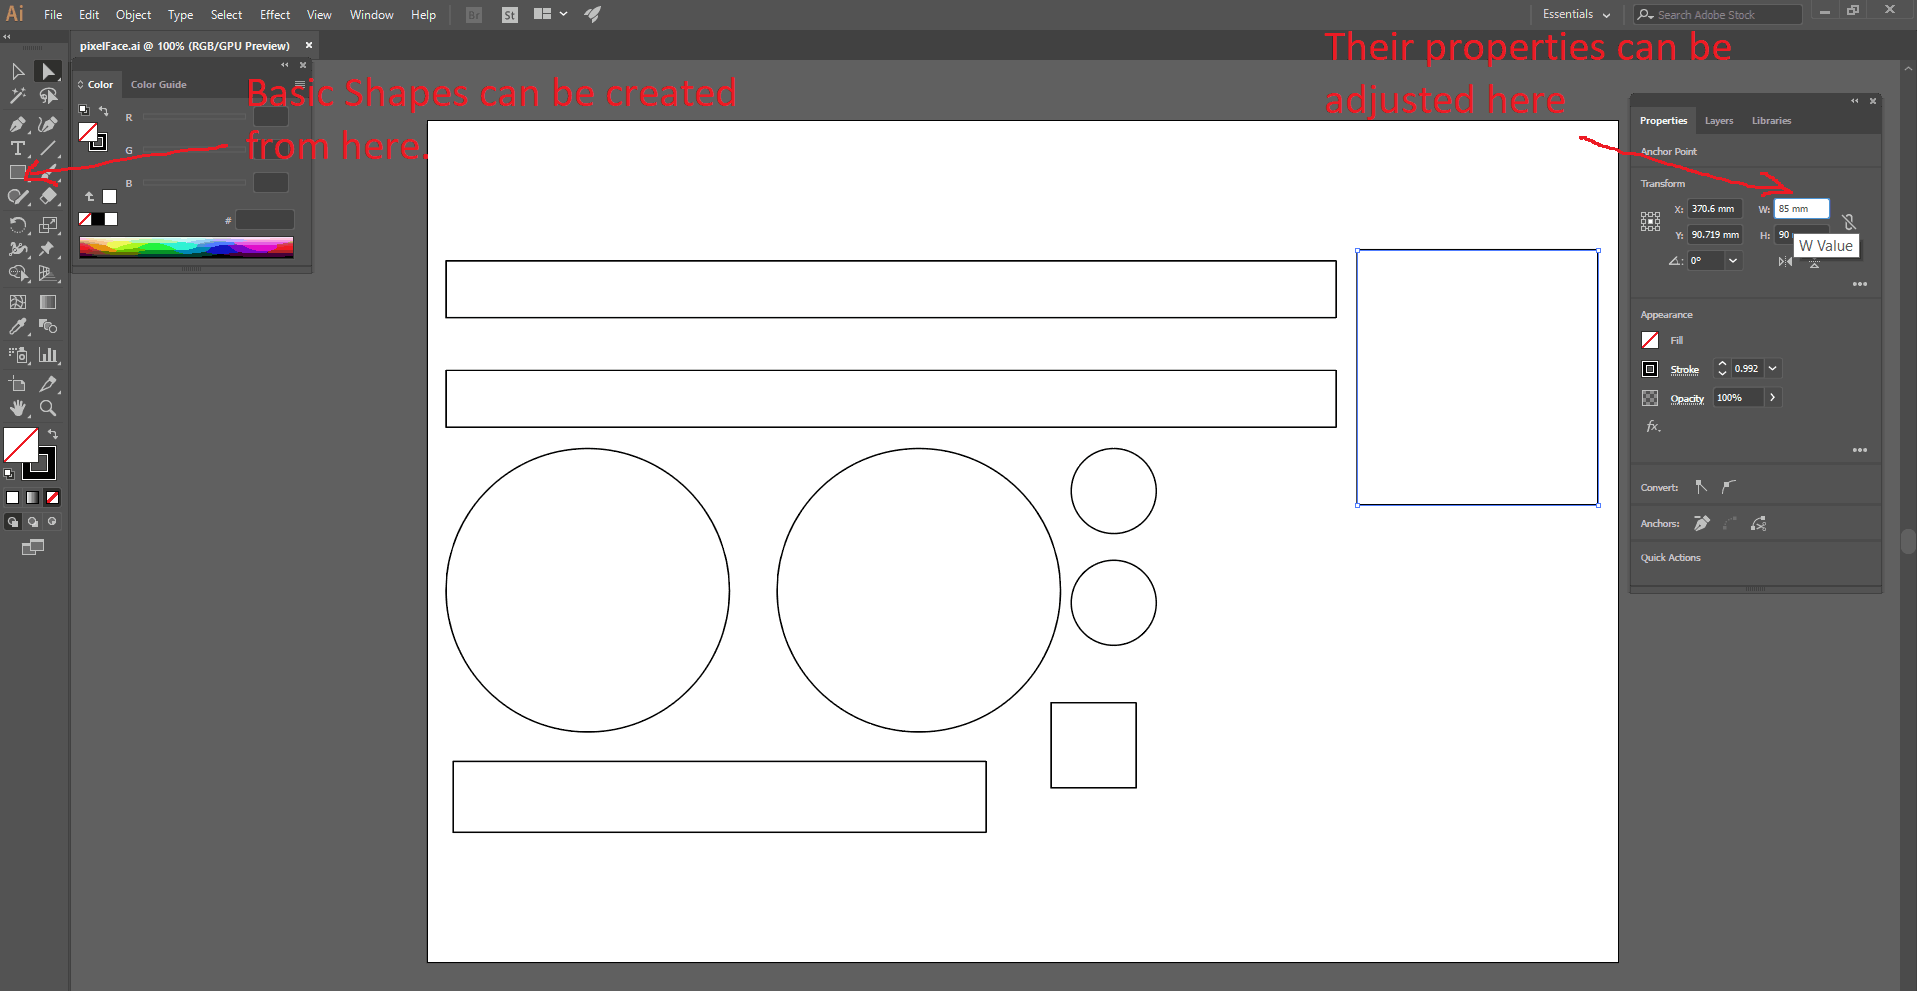
Basic shapes can be created and modified through the tool box on the left and their properties on the right.
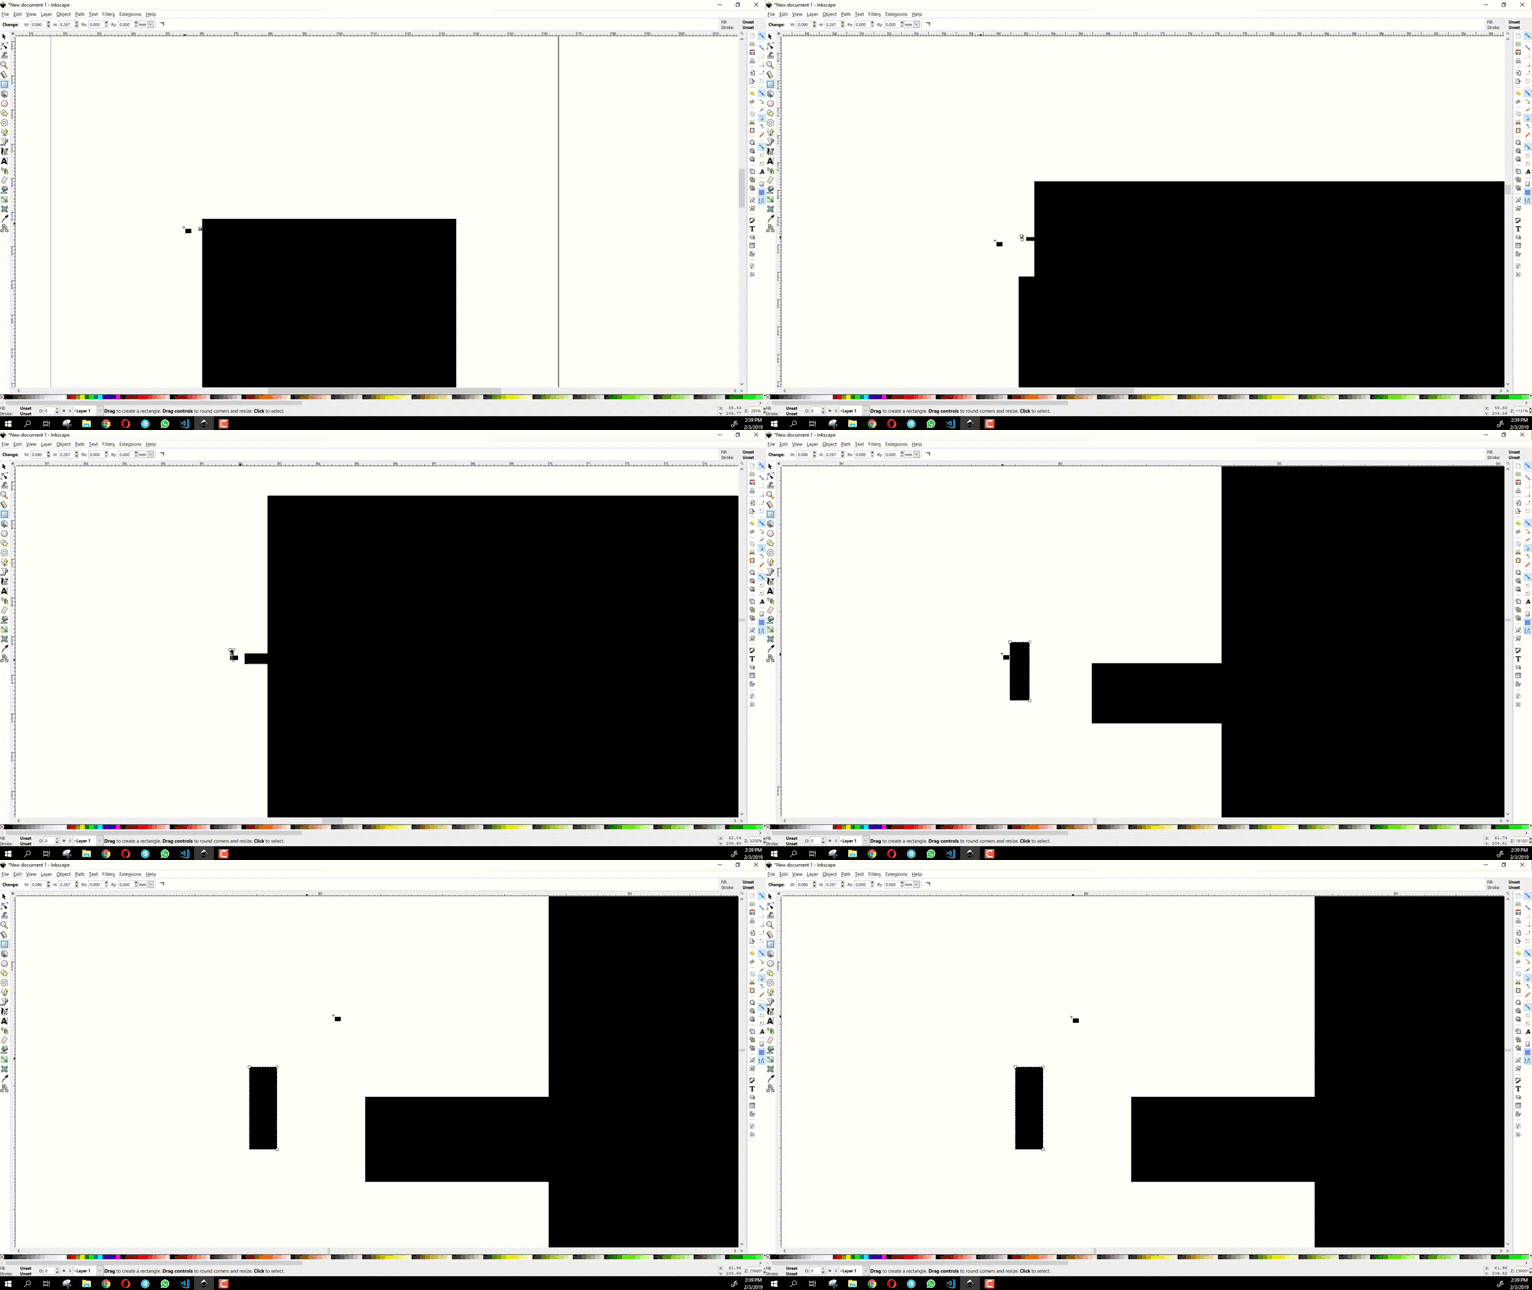
I used basic Shapes and modified their attributes to come up with this,
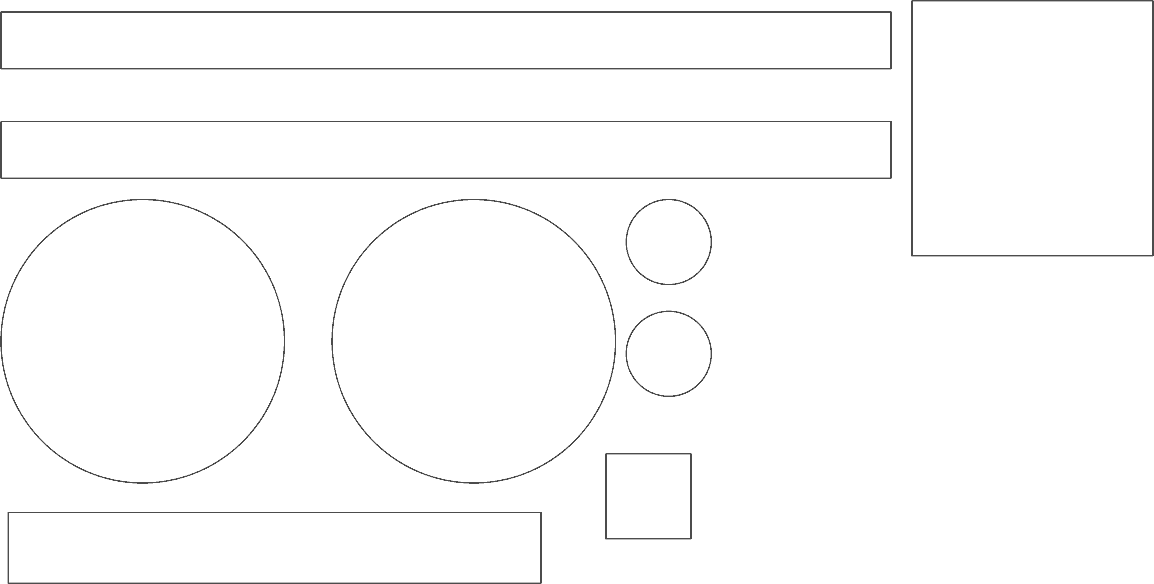
Then I asked my Instructor, Gaurav, to help me get this laser cut. The laser cutter here only accepts dxf files and that too in Autocad v2004 format. So I saved the illustrator file as a dxf file and when the prompt for compatibility came, I just clicked Autocad 2004.
Then I transferred the file to the laser cutter. After a fancy light show, I was left with these.
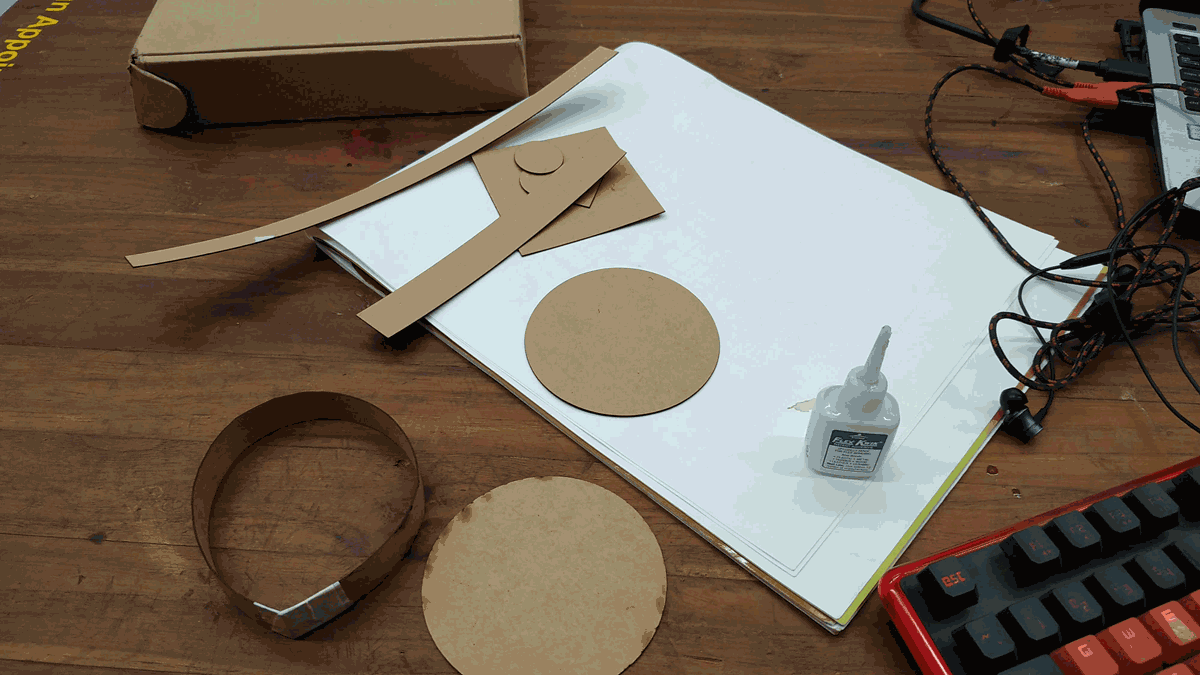
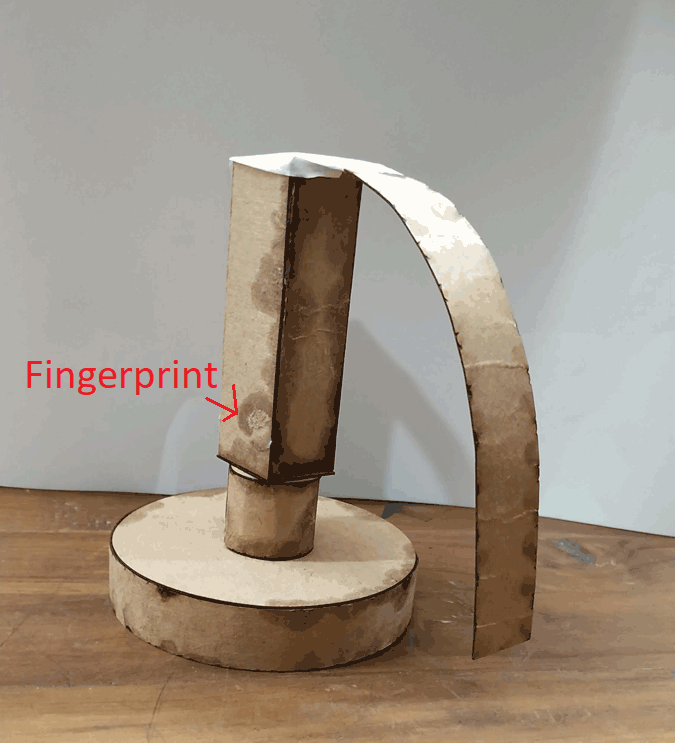
After some intense glue work, I literally have my fingerprints stuck on the cardboards…
Here’s a screencapture of my whole work process in illustrator.
Comparison betweeen all the 2D software I tried
| MS Paint | GIMP | Adobe Photoshop CC | Adobe Illustrator CC | |
|---|---|---|---|---|
|
|
|
|
|
| Graphic Type | Raster | Raster | Raster/Vector | Vector |
| License | Free | Free | Paid | Paid |
| Learning curve | Very easy | Slightly difficult | difficult | Slightly difficult |
| Best feature | Built into Windows, highly optimized. Useful for quick edits. | Cross platform, free to use and has almost all tools to compete with photoshop. | The Profesional Standard in graphics work. Has every tool necessary for this line of work. | Built into the Adobe creative cloud. UI is clean and similar to photoshop. Can generate a wide range of output files. |
| What I would use it for | Quick and fast edits on single file. | Batch Image manipulation | Creating posters, banners and online content. | Create vectors for Laser cutting, CNC etc |
| Output | |
|
|
|
3D Designing
3D designing is completely new domain for me. So I asked my instructor for some newbie advice and he recomended fusion 360 and then explore other stuff as well.
I am also planning to explore generative design tools because I am a huge fan it, I mean, it looks alien.
Fusion 360
To use Fusion360 firstly you need a license key and you need to be connected to the internet. The reason for that is that Fusion360 is cloud based which makes it very light and it doesn’t clog up my really low spec laptop.
Since I am a complete newbie when it comes to 3D design, I started off with watching tutorials first. The best thing about Fusion360 is probably the online resources. They have amazing official tutorials which can be found here .
Sketches
I started with a rough sketch of the base of PixelFace. The dimensions don’t need to be accurate at this stage. Just a rough sketch works fine.
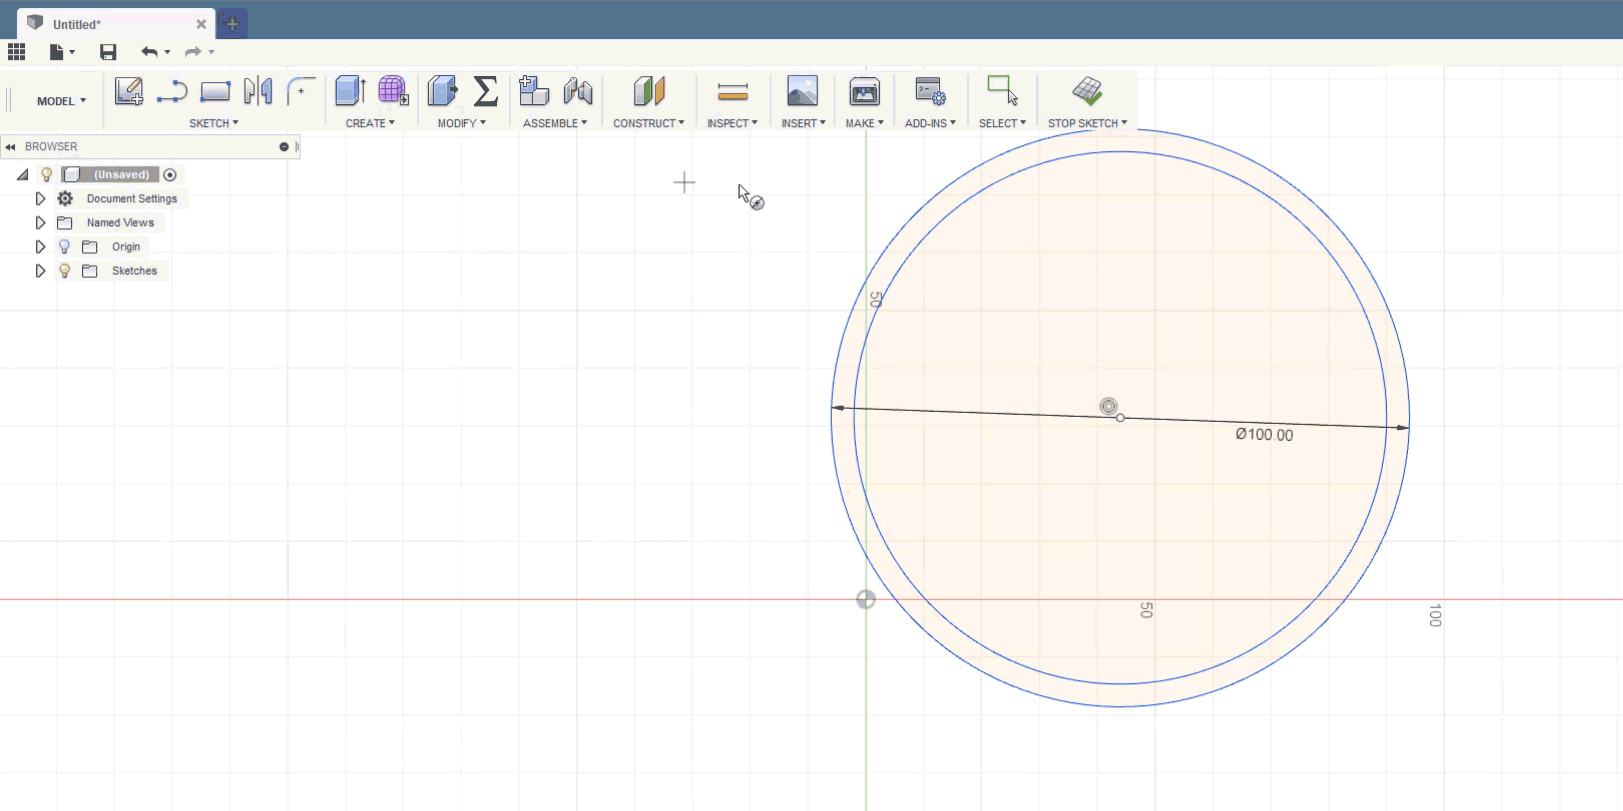
Constrains and Parameters
Then I started to constrain them. Since I am using circles here, I just made all the circles concentric.
I then brougth up the parameters menu and created basic parameters for my design, such as wall thickness, base diameter and motor diameter.
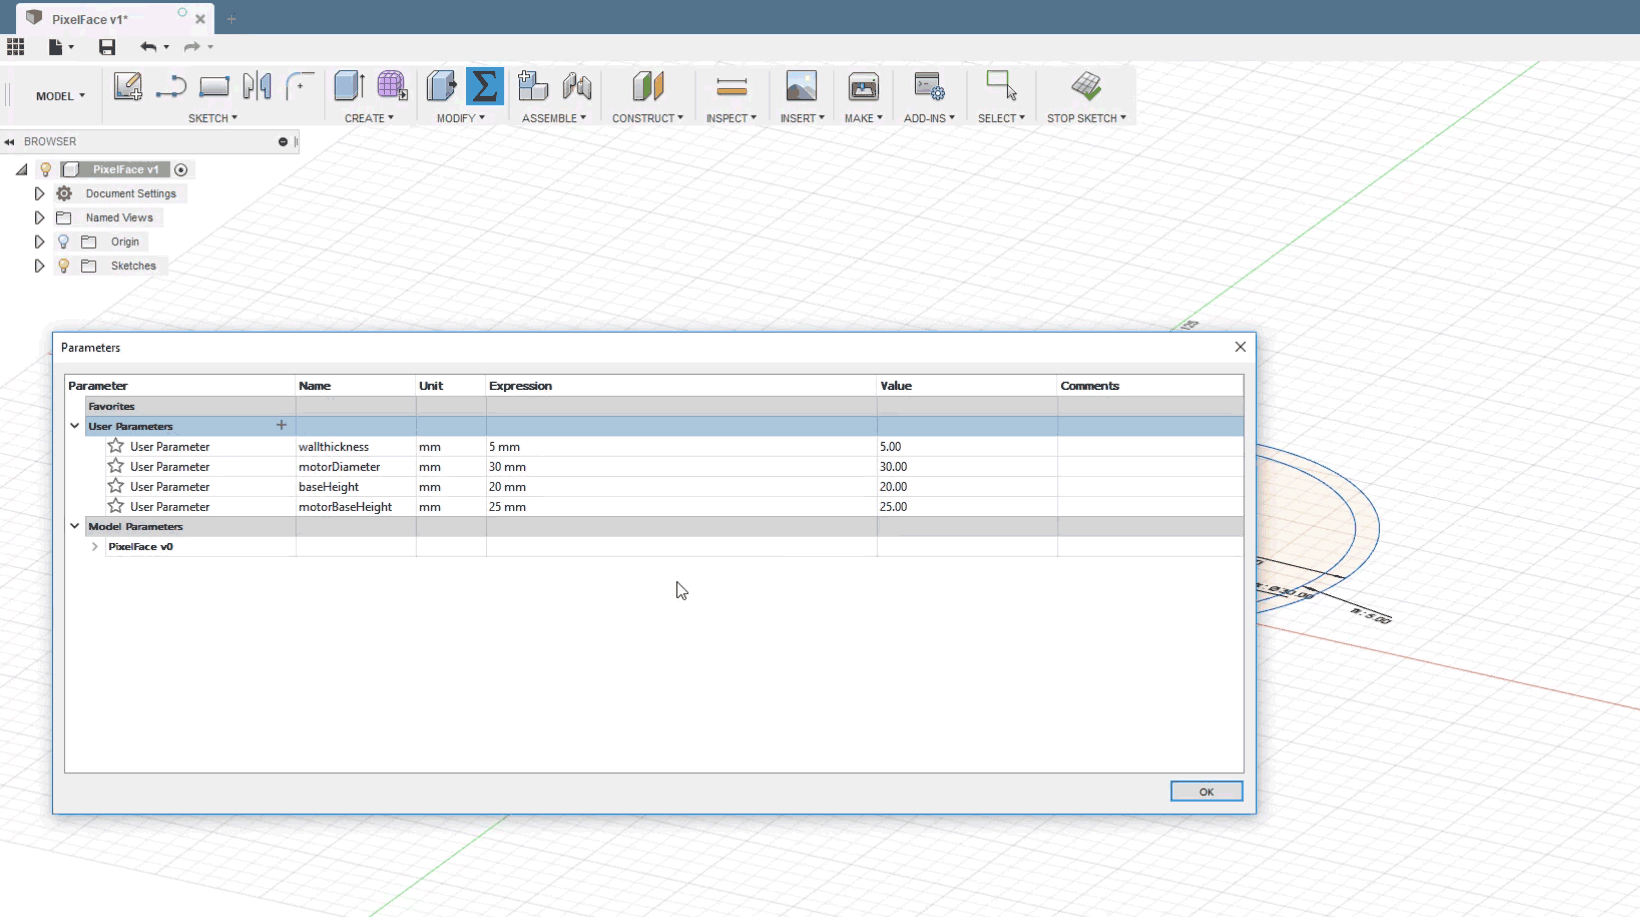
Then I used the dimension tool to add dimensions to my sketch. With this method, my design will be parametric. I can just edit the parameter variables I created and my design will change accordingly.
Extrude
To create a 3D object out of my sketch, I used the extrude tool.
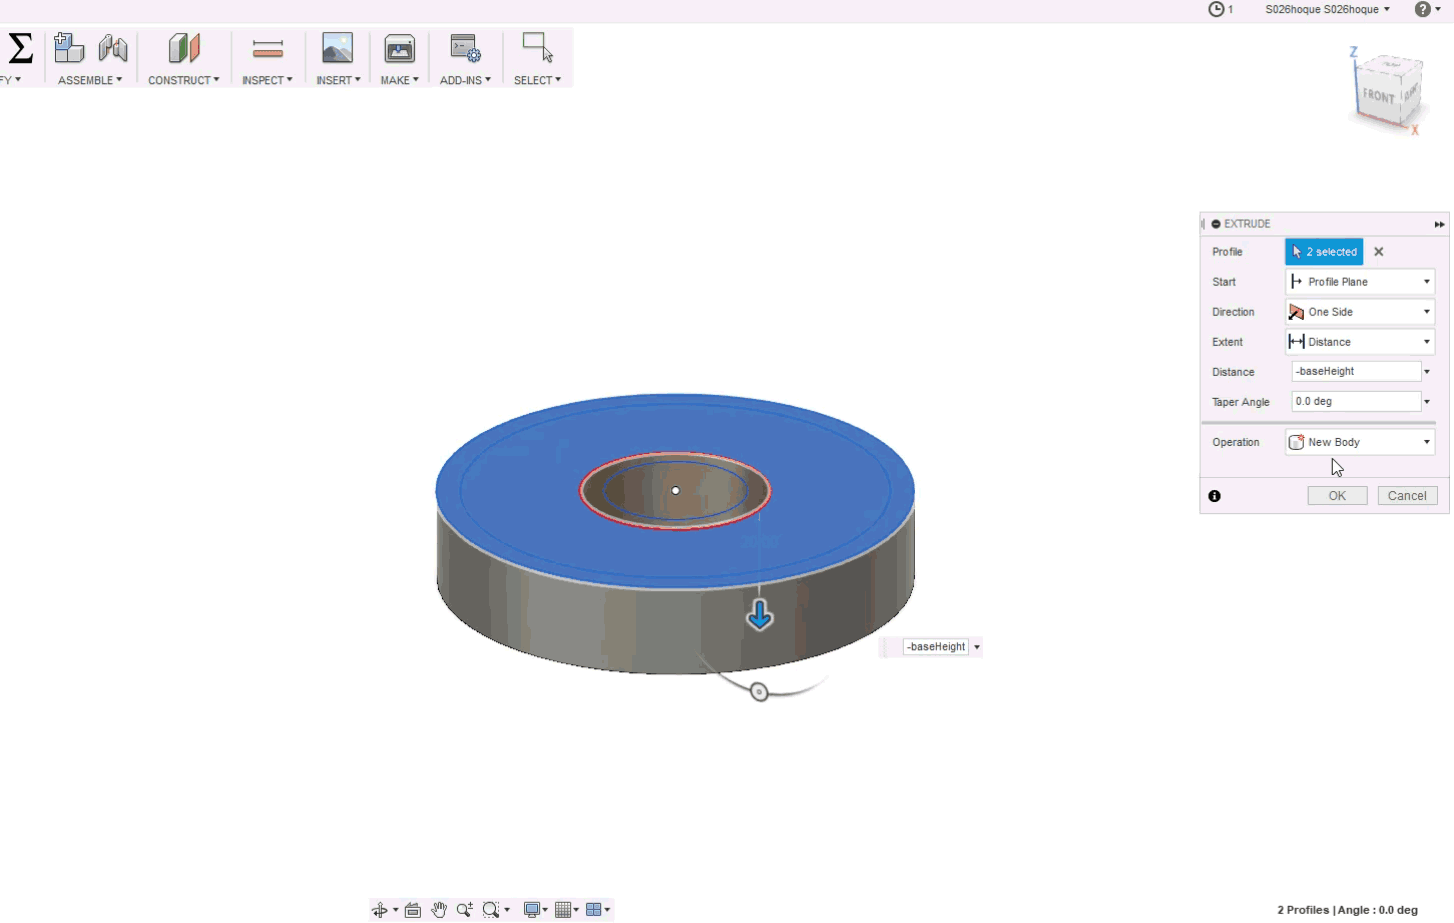
For extruding the Motor mount, I used extrude from offset and used the base height as an offset.
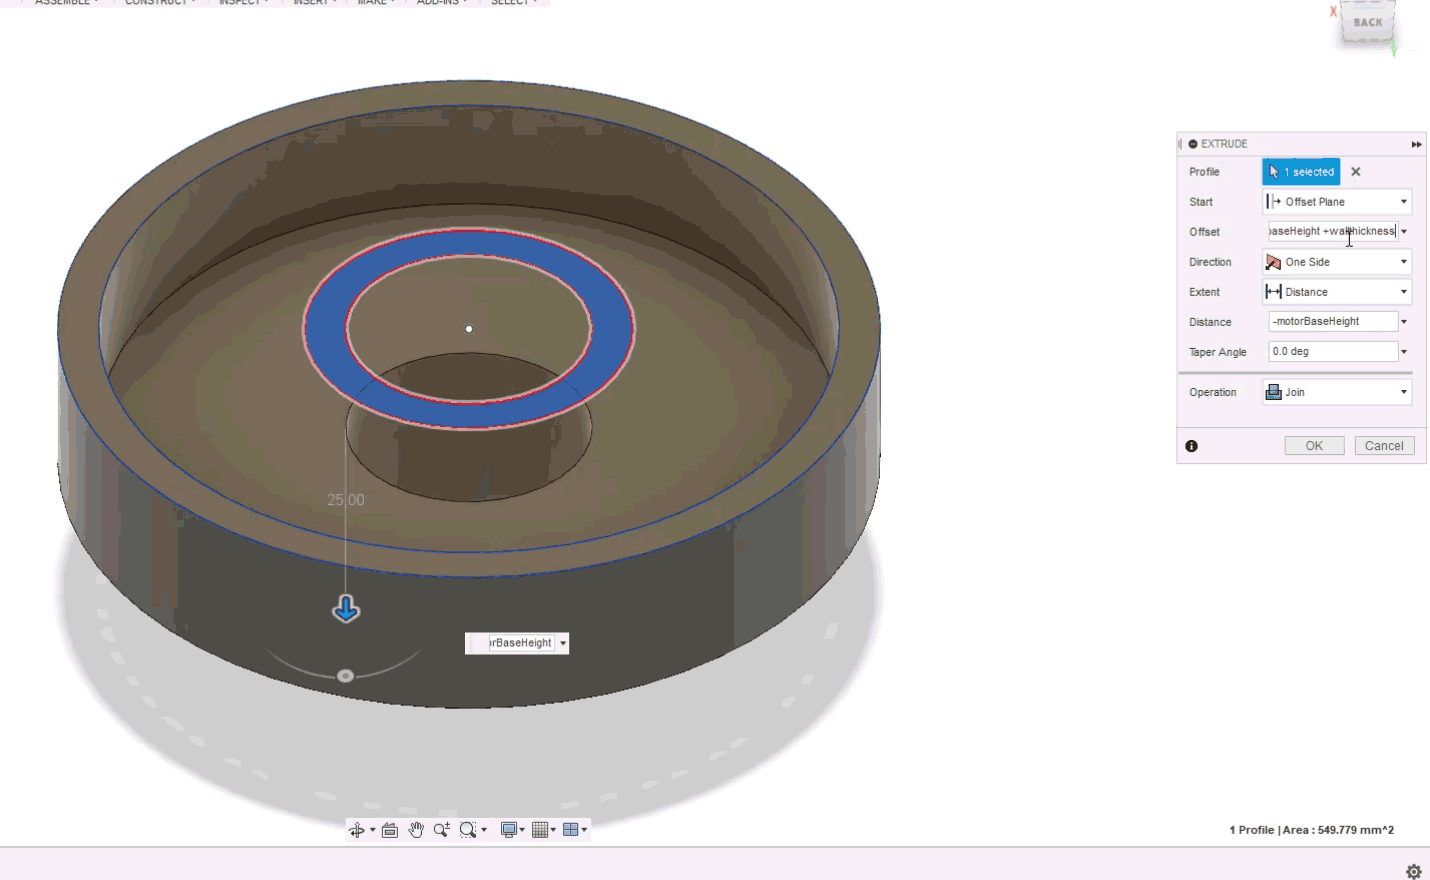
With that I was ready with the 3D model of my base. I decided not to complicate this design any further for now and explore generative design with this model.
PixelFace Base by s026hoque on Sketchfab
| Fusion 360 | MeshMixer | |
|---|---|---|
| Graphic type | 3D/2D | 3D |
| License | Educational Version is free | Free |
| Learning Curve | Very Intuitive | Very easy |
| Best Feature | Combines 2D design with 3D, parametric, Easy to run on low spec Machine | Free to use, can be used to generate shapes in 3D objects desgined in f360 |
| What I would use it for | Make 3D designs for my project, share and collaborate with others using a360 and the mobile app. | Since Generative feature in Fusion 360 is not free, I’ll use MeshMixer to optimize my Desingns through trial and error. |
| Output | 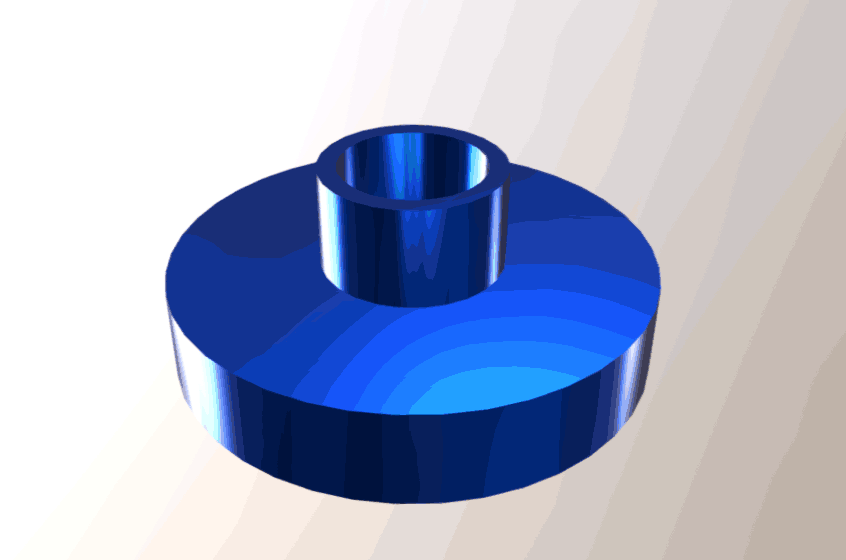 |
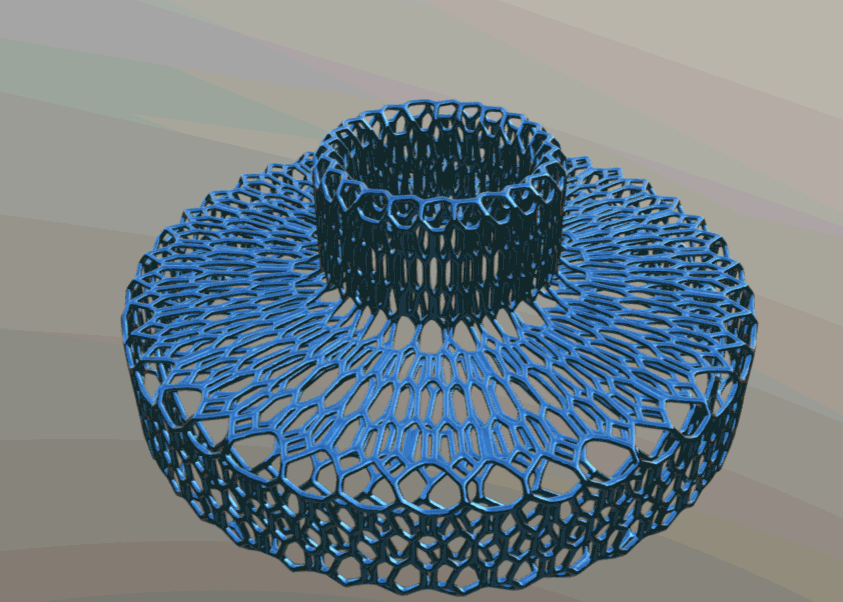 |
Mistakes Made this week
- Since I am from not from a design background, it was VERY difficult for me to get the hang of 3D design. I could not explore Blender even though it was on my list. The UI, even after watching hours of tutorials was disorienting to me.
- I could not model the upper half of my project Idea because of the complicated pattern. I am hoping to find a way of how to do it in fusion 360.
Downloadables
| MS Paint | |
| PNG Ouput | Download |
| GIMP | |
| xcf Ouput | Download |
| PNG Output | Download |
| Photoshop | |
| PSD Output | Download |
| PNG Output | Download |
| Illustrator | |
| Ai Output | Download |
| DXF Output | Download |
| PNG Output | Download |
| Fusion 360 | |
| a360 link | Download |
| f3d Output | Download |
| Obj Output | Download |
| MeshMixer | |
| Obj File (high) | Download |
| Obj File (low) | Download |
Learning Outcomes
- I learnt how to use GIMP, some additional features in photoshop and compared them.
- I learnt 3D cad designing, which was completely new to me. Fusion360
- I learnt how to use meshmixer to create very intricate designs.
What I want to explore more
- I’d like to know a bit more about generative design.
- I’ll try to learn rhino and grasshopper.
- I definitely need to get better on fusion360.
Updates
**update after local review on 26/3/19**
My 3D modelling design was too simple only had one 3D operation because I was still very novice at using Fusion360 back then. My local instructor asked me to add 3 more 3D operation to the design.
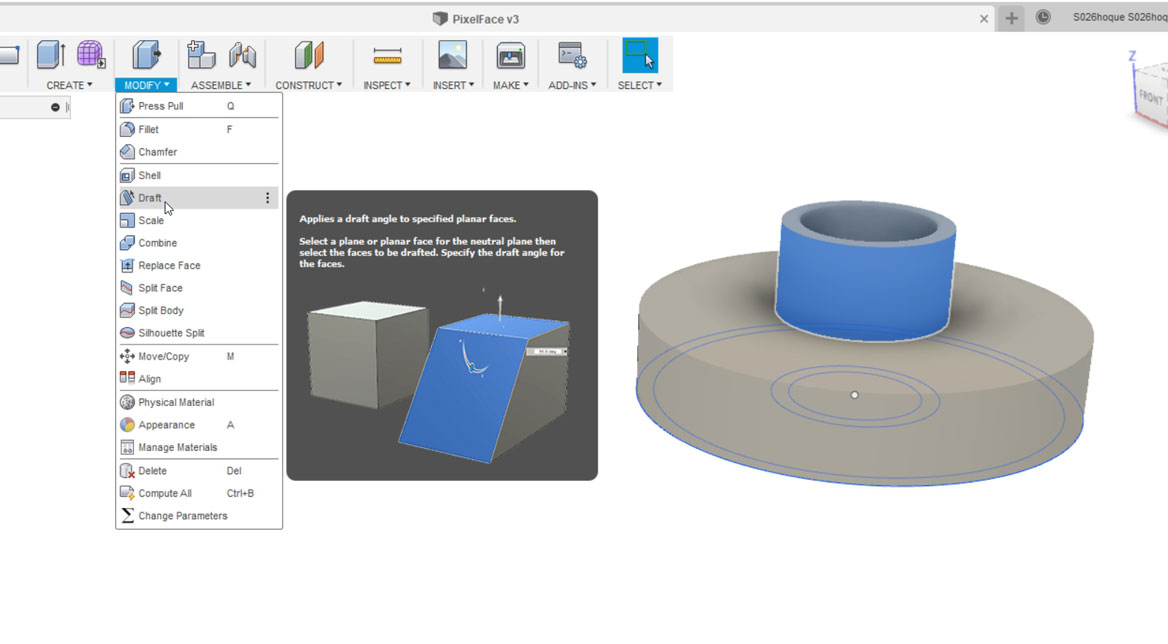
Draft
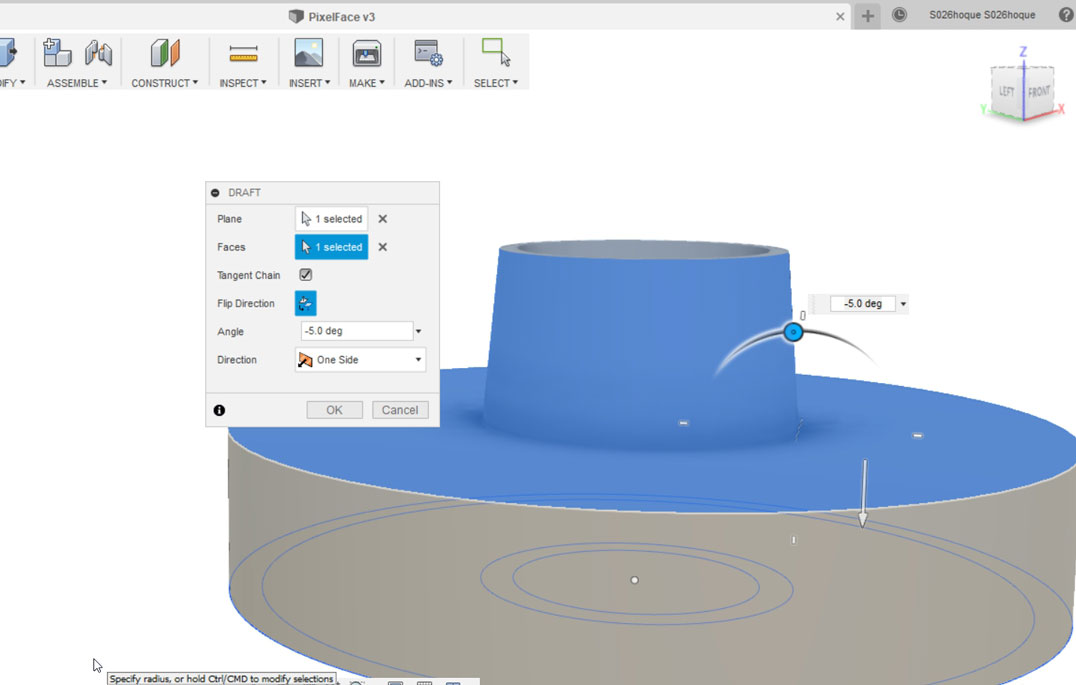
The draft Operation can add an angle between a selected plane and selected surface. I learned and used this feature in week 10 during the Molding Casting Week.
Here I added a draft angle to the motor extrusion for the base I made for my week 3 design.
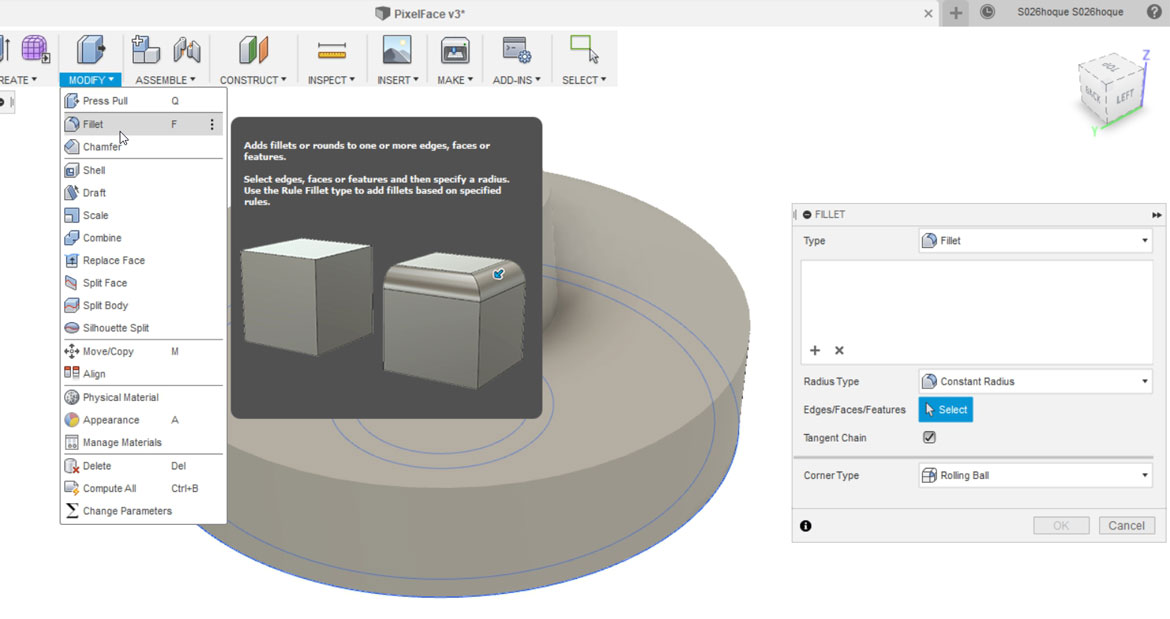
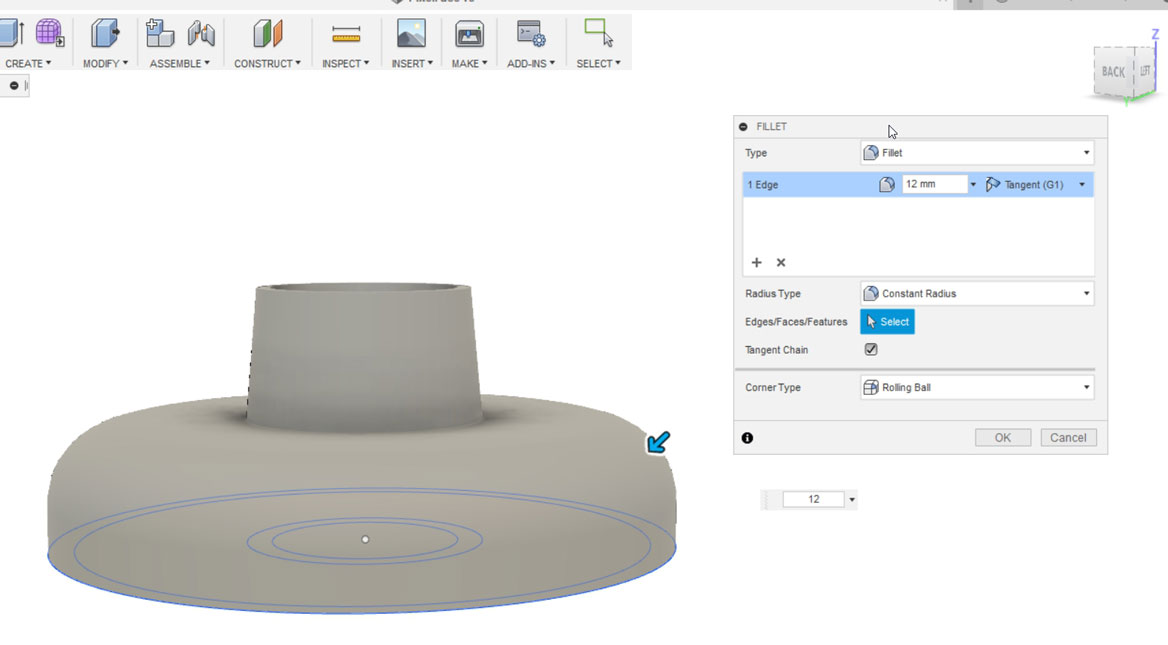
Fillet
Like the 2D fillet feature, the 3D fillet tool can add curvatures to corners and sharp surfaces.
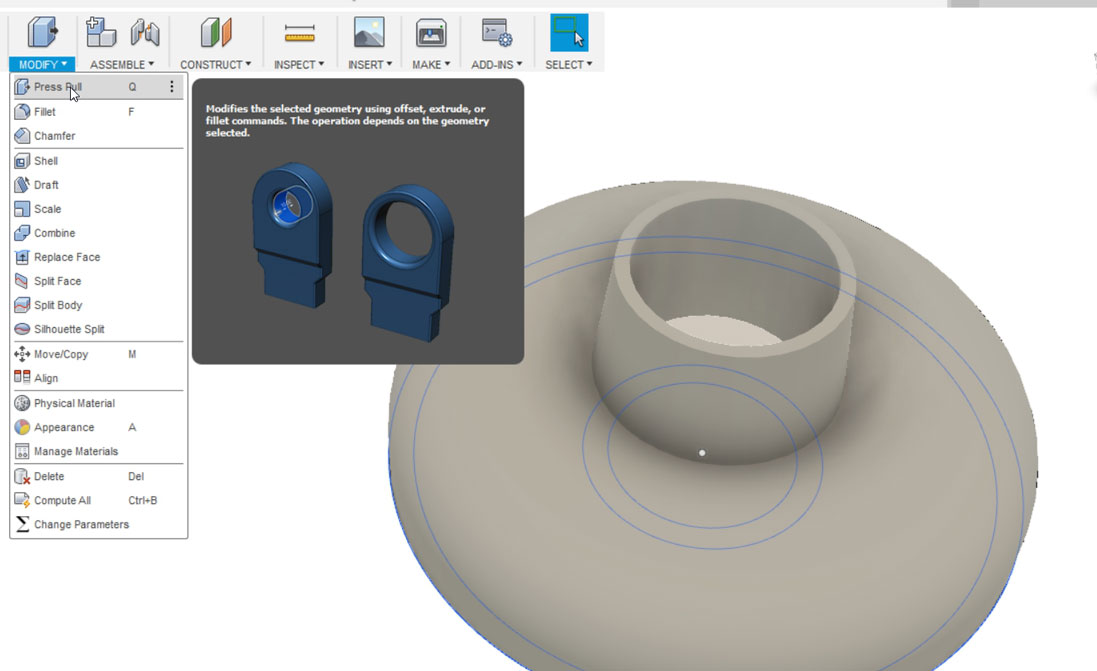
Press Pull
The press/pull operation can select a face and deform the 3D object accordingly.
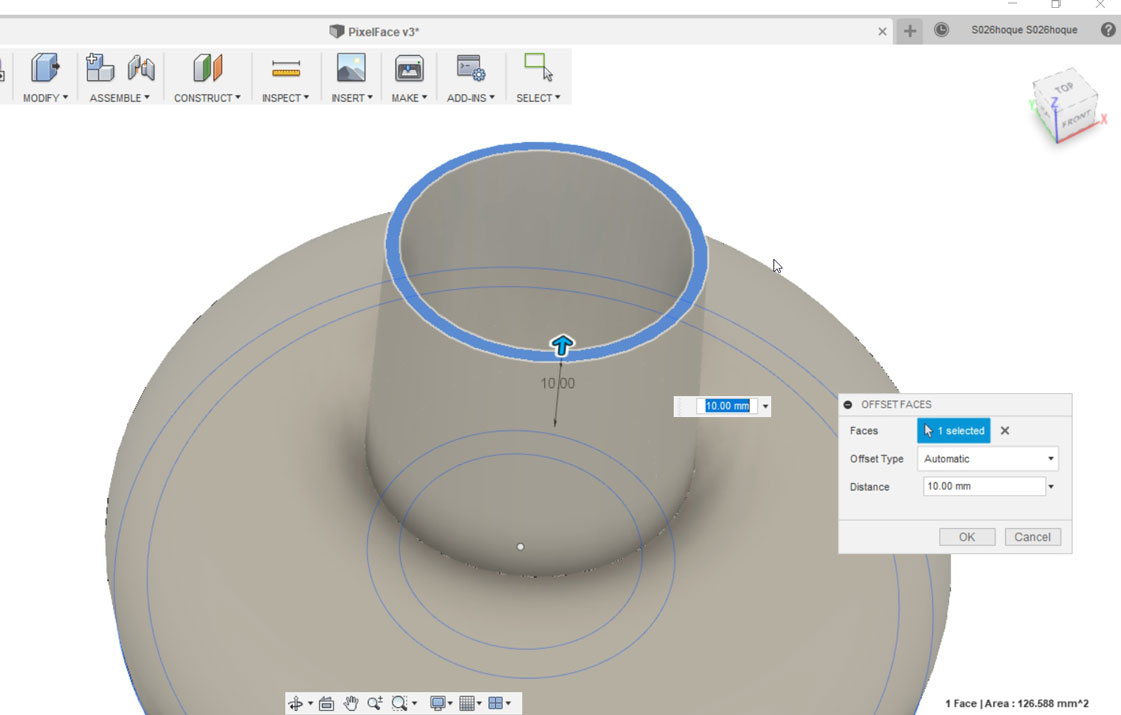
This is how my model looks like after these three operations other than extrude, which I used earlier this week.
Pixel Face Basev2 by s026hoque on Sketchfab
3D Designing Learning Curve
I have come a long way from my first exposure to 3D Designing from my initial work on week 3. Now I can design what I can visualize using Fusion360.
My 3D Printing and Scanning Week, design file can be viewed here.
My Computer Aided Machining Week, design file can be viewed here.
My Molding & Casting Week, design file can be viewed here.